A visual step-by-step guide to adding the Finzite MCP server to Claude and signing in with your Finzite account.
MCP SERVER URL
https://connect.finzite.io/mcp
Setup: 9 steps • Authentication: Finzite sign-in
Before you begin
Make sure you can sign in to Claude and your Finzite account. Follow the screenshots in order. Use your own Finzite credentials when prompted.
1
1. Open Claude Settings
Open the Claude account menu and select Settings.
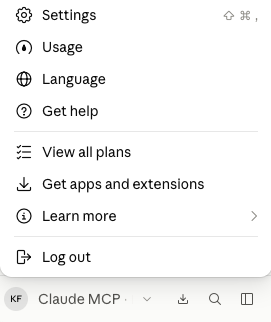
Look for Settings in the account menu shown in the screenshot.
-
2. Open Connectors
In Settings, select Connectors from the left-hand navigation.
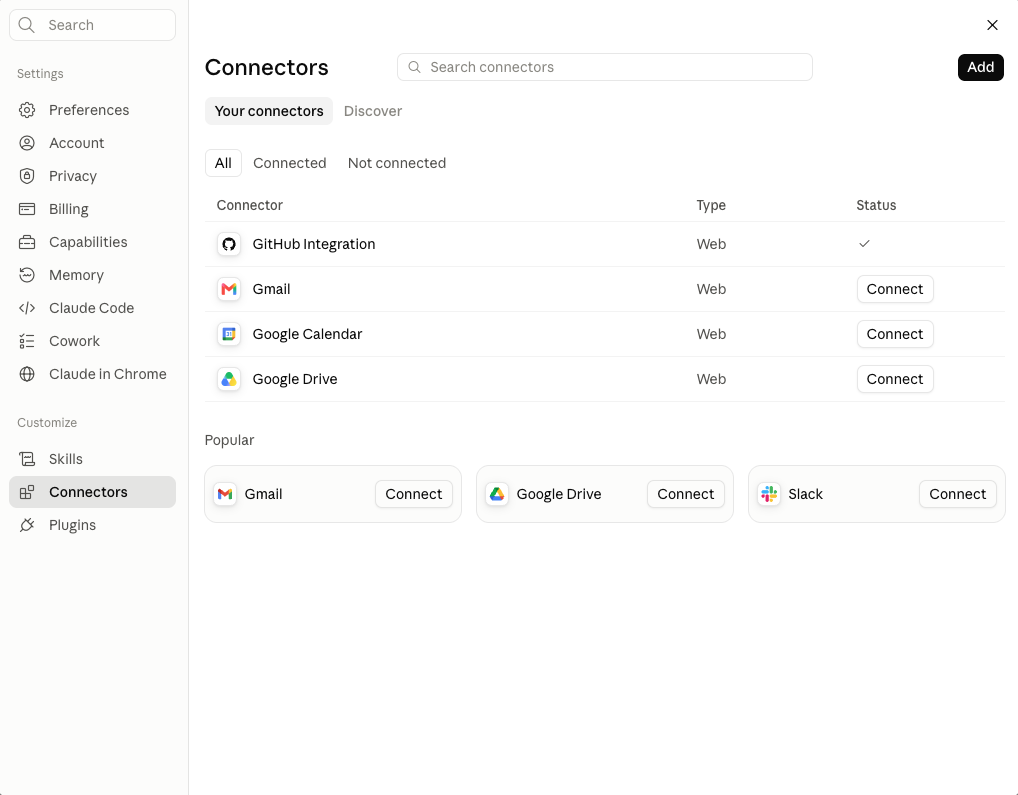
You should land on the Connectors page. The Add button is in the top-right.
3. Add a custom connector
Click Add and proceed with the option to add a custom connector.
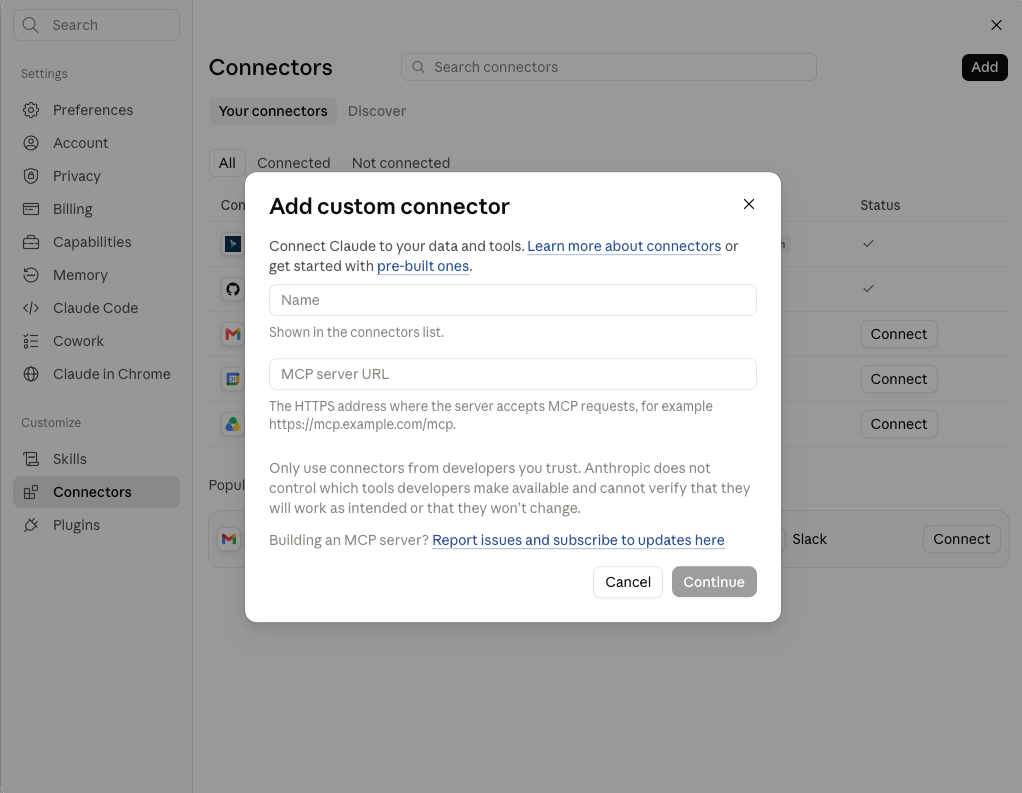
A window titled Add custom connector will appear.
2
4. Enter the Finzite MCP details
Enter Finzite MCP as the connector name and use the Finzite MCP server URL: https://connect.finzite.io/mcp Then click Continue.
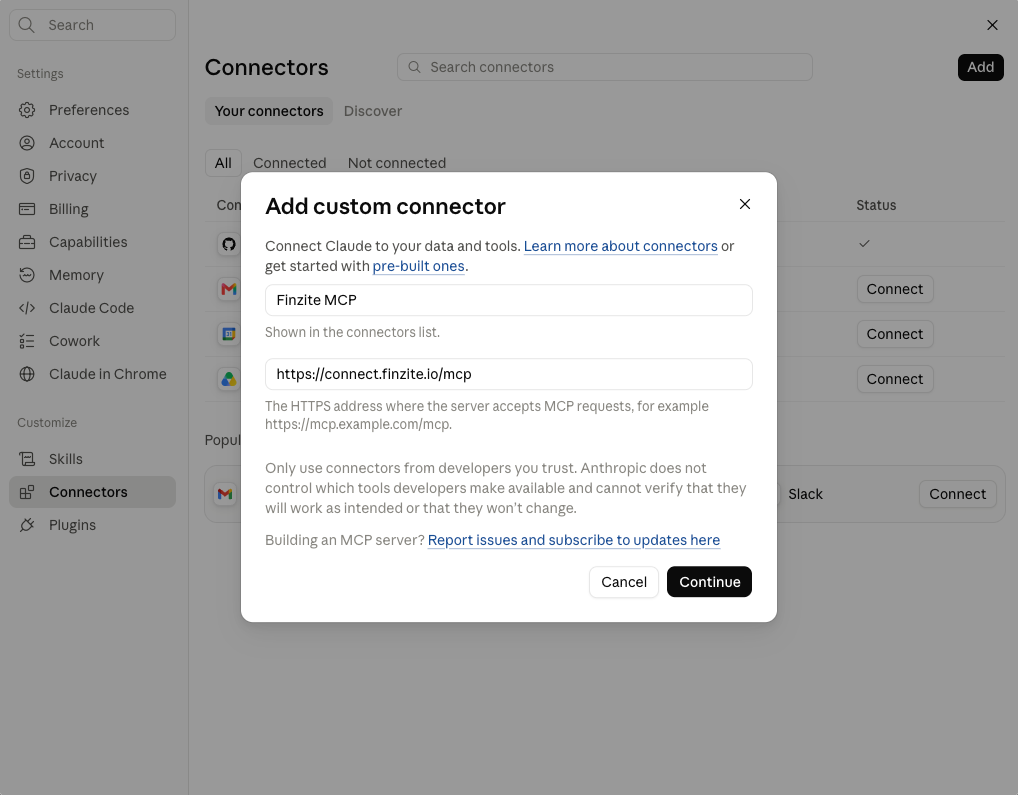
The two fields should match the values shown in the example.
v
5. Confirm authentication settings
Keep Sign in now selected. Under OAuth client, select Use Claude's published identity (Recommended), then click Add.
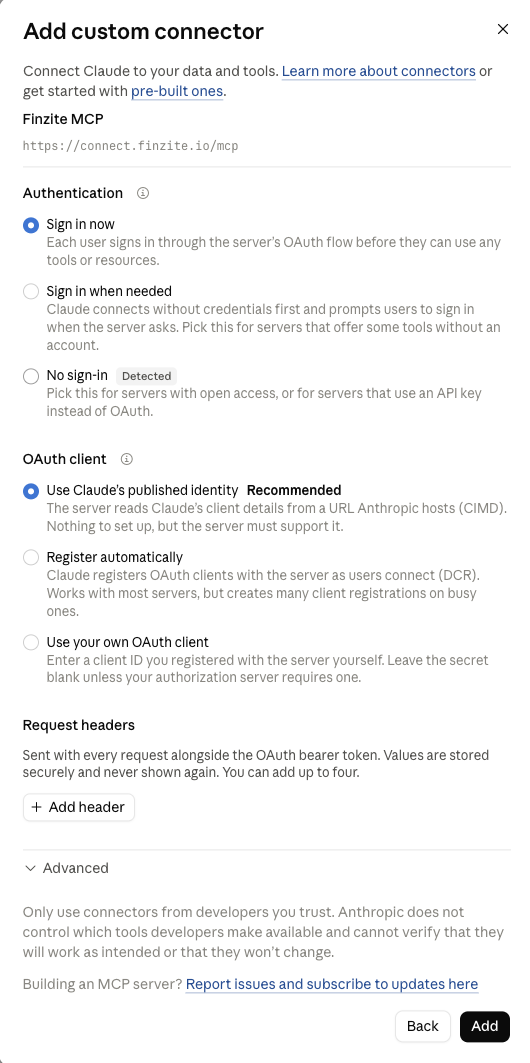
The screenshot shows the recommended authentication and OAuth options.
4
6. Open the Finzite connector
After adding the connector, open Finzite MCP from the Connectors list and click Connect.
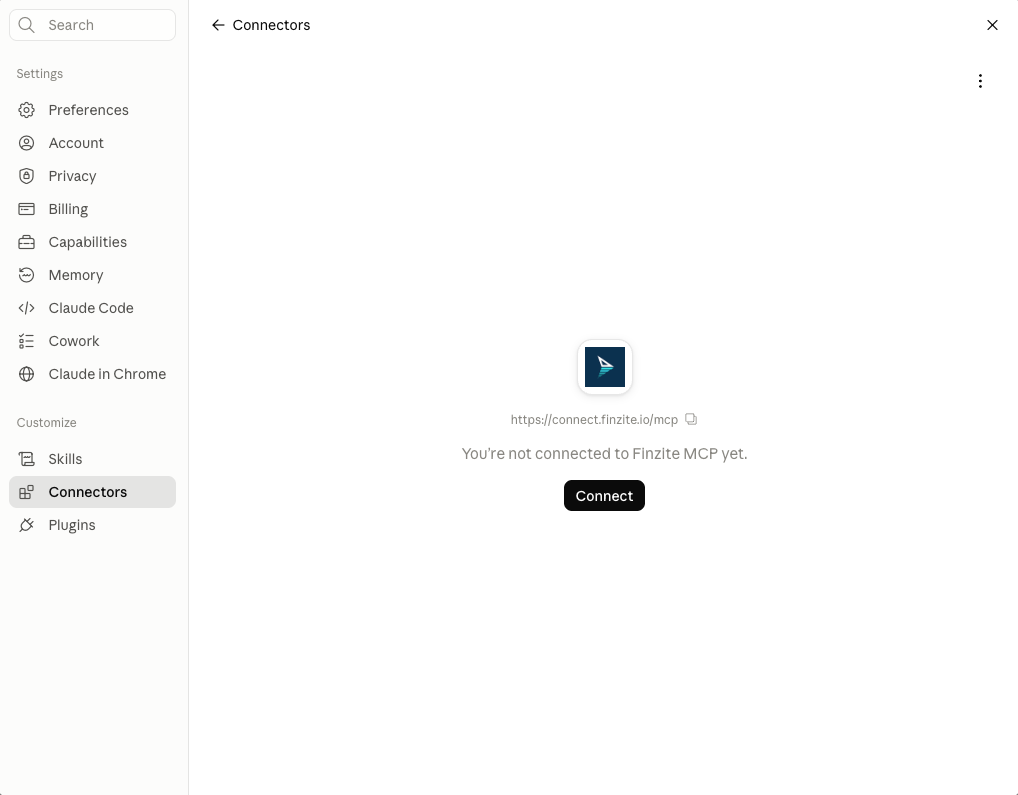
You should see the Finzite MCP connector with a Connect button.
7. Sign in to Finzite
Enter your Finzite account email and password on the Finzite sign-in page, then click Sign in.
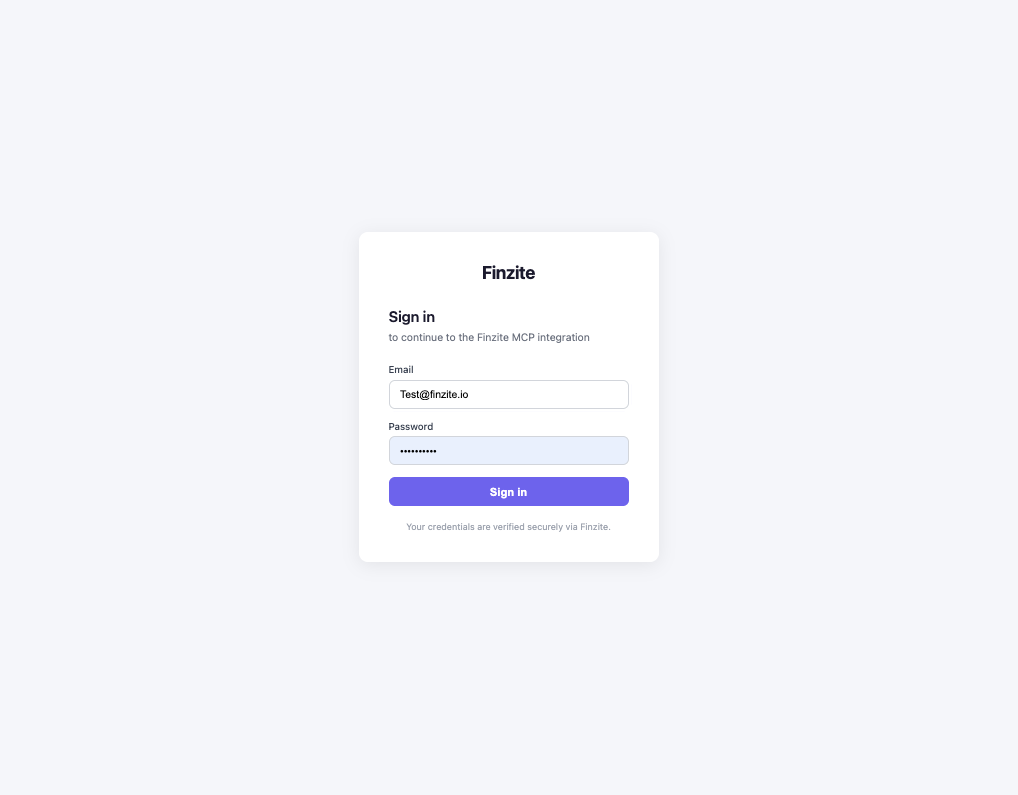
Use your own credentials. Any credentials visible in the example screenshot are demonstration-only.
5
8. Confirm the connection
Return to Claude. Finzite MCP should now appear in the connector list with a connected status.
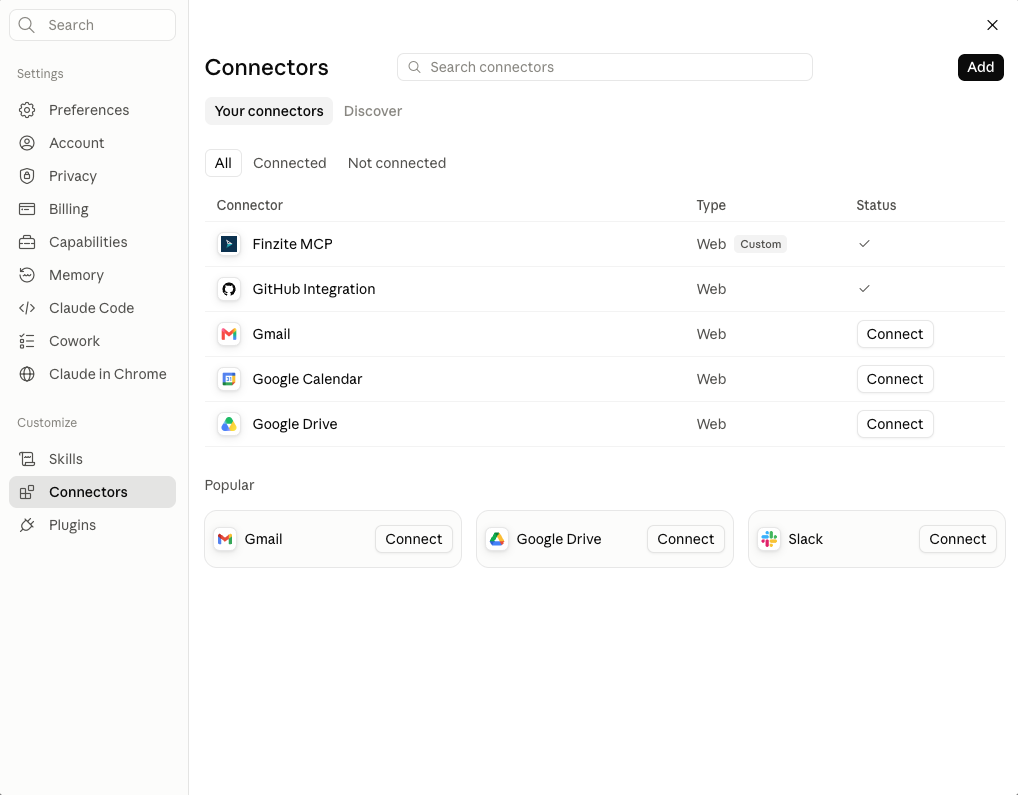
A check mark next to Finzite MCP indicates that the connection is active.
v
9. Review tool permissions
Open Finzite MCP to review the available tools and their permission settings. The example includes contribution reporting and store-related tools.
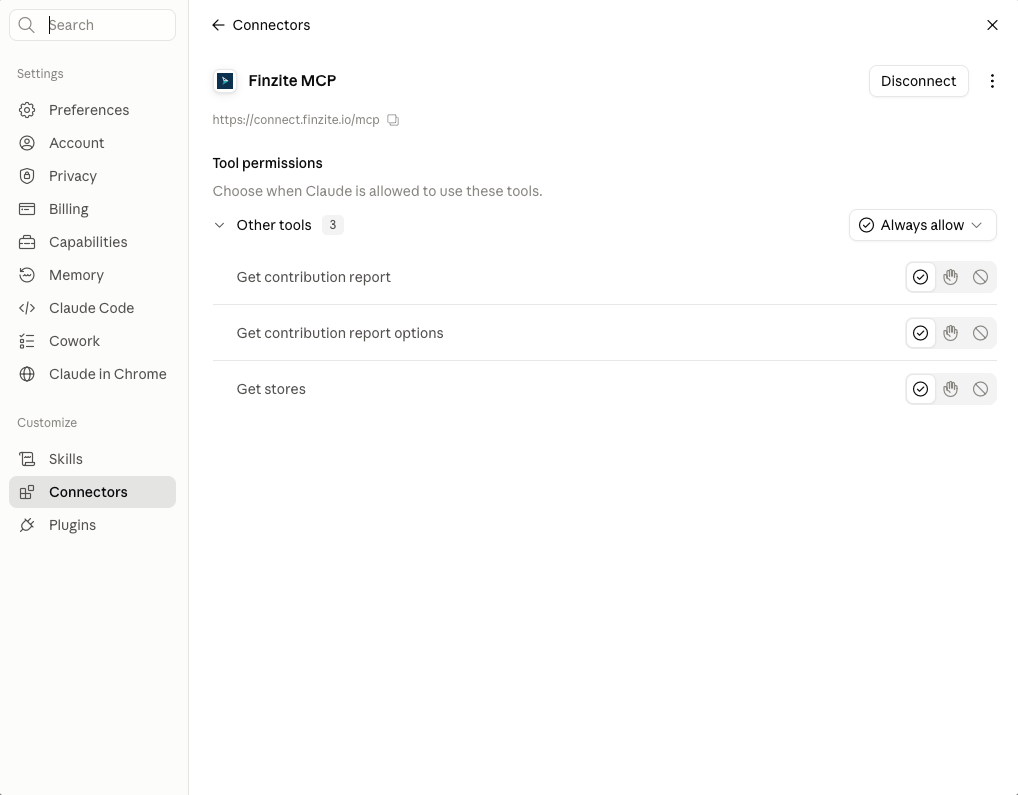
You can review or adjust when Claude is allowed to use the Finzite MCP tools.
n
10. Connection complete
Finzite MCP is ready once the connector shows as connected and the required tools are available under your permission settings.
| CHECK | EXPECTED RESULT |
|---|---|
| Connector name | Finzite MCP |
| MCP server URL | https://connect.finzite.io/mcp |
| Authentication | Sign in now |
| OAuth client | Use Claude's published identity (Recommended) |
| Connection status | Connected / check mark visible |
| Tools | Available according to your configured permissions |
Quick path in Claude
Settings → Connectors → Add → Custom connector → Finzite MCP → Connec
Was this article helpful?
That’s Great!
Thank you for your feedback
Sorry! We couldn't be helpful
Thank you for your feedback
Feedback sent
We appreciate your effort and will try to fix the article